CALL US OR CLICK ON SHOP NOW
Los Angeles: (424) 528-2091
San Diego: (760) 744-2901
Fresno: (559) 276-5652
Bakersfield: (661) 664-5735
Installing Kitchen Sinks
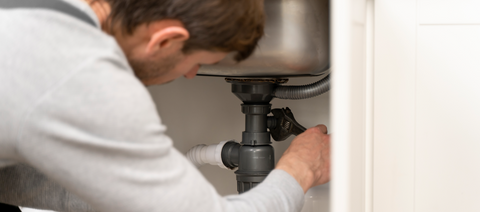
It's not so easy to install a kitchen sink without destroying your countertop, but a DIY installer with average skills can complete the replacement in about four hours.
Step 1: Buy a sink that will fit the existing opening. (You can buy a sink that’s slightly bigger than the opening, but it may be difficult to enlarge the hole.) Buy the rest of the supplies you’ll need and get everything ready to go. If you’re replacing a cast-iron sink, be sure to have some extra muscle on hand to help manage the weight.
Step 2: Clear out the sink cabinet and crawl in there with a flashlight. Locate the clips that secure the sink and its rim to the countertop. Remove them and disconnect the supply and drain plumbing.
Step 3: With your helper holding the sink from above, push up on the old sink from underneath. You may have to run a putty knife around the perimeter to loosen the old caulk seal. With the old sink removed, test-fit the new one.
Step 4: Prepare the new sink by installing the faucet according to the manufacturer’s directions. Two common sink installation mistakes are, one, forgetting to clean the new sink thoroughly before installing and, two, forgetting to install the new faucet before installing the new sink. Factory-fresh stainless steel sinks smell awful, so it’s best to scrub them down outdoors. And it’s a lot easier to install the faucet before you install the sink, for at this stage, the mounting nuts are more accessible. While you’re at it, install all accessories too, including sprayer and detergent dispenser mounts.
Step 5: When installing the faucet and sprayer bases, apply a ribbon of plumber’s putty first.
Step 6: Apply caulk under the sink rim and seat it in the opening.
Step 7: Install the drain and tail pipe, seating it in caulk or using the supplied gasket—whichever method is recommended by the manufacturer.
Step 8: Install the new clips, then reconnect the supply lines and drain pipes. If using flexible supply hoses (recommended), don’t reuse the old ones. The rubber gasket that seals the connection may have hardened over the years and may not seat properly to the new faucet’s tailpieces.
Step 9: Finally, turn on the water and run it for several minutes. Check for leaks at all connections, especially at the tubing, around the drain, and around the trap.
- Choosing a selection results in a full page refresh.